(SPEECH)
[00:00:00.00] [MUSIC PLAYING]
(DESCRIPTION)
[00:00:00.00] Logo, L.L. Bean. Title, Ice Skating Tips for
Beginners. A woman skates into the center of an ice rink. Caption,
Wyoma, Ice Skating Instructor.
(SPEECH)
[00:00:10.24] Hi, there. I'm Wyoma. I'm a figure skating
coach who has been teaching beginners of all ages for over eight
years.
(DESCRIPTION)
[00:00:16.48] Caption, Family Ice Center, Falmouth, Maine.
(SPEECH)
[00:00:19.45] Today, I'm at the lovely Family Ice Center to
go over some of the basics of starting your skating journey. By the
time we're done today, we'll have talked about what to wear, what
skates to use, how to take your first steps on the ice, and how to
stop. I hope by the time we're done, you'll realize that with the
right guide, it's easy to glide. Let's skate.
(DESCRIPTION)
[00:00:37.66] Wyoma skates on one foot, then the other
across the rink. She holds both arms straight out to the sides and
skates backward while watching behind her. She wears an L.L. Bean
beanie and jacket.
(SPEECH)
[00:00:47.98] Learning anything is easier if you're
comfortable. So before you hit the ice, make sure to outfit yourself
properly.
(DESCRIPTION)
[00:00:53.68] Text, Dress for success.
(SPEECH)
[00:00:55.45] For skating, this means layers. It's going to
be chilly out on the ice, but you're also going to be moving. Most
people are surprised by how much of a sweat they work up while
skating around the ice.
(DESCRIPTION)
[00:01:04.74] Wyoma skates sideways and kicks a foot in the
air.
(SPEECH)
[00:01:07.73] You want to dress in warm, light layers that
can be added or removed according to your ideal comfort. For me,
this means wearing a vest that will keep my core temperature up
while allowing me to move around the ice.
(DESCRIPTION)
[00:01:18.36] Animation, the fluid in a thermometer rises.
(SPEECH)
[00:01:21.07] All right, let's have the socks talk. You
might think you want to wear thick socks because thick socks are
great. They're just not so great for skating in. Thick socks will
limit your movement and affect your balance.
(DESCRIPTION)
[00:01:31.79] Wyoma holds up two colorful thin pairs of
socks.
(SPEECH)
[00:01:34.90] For your ideal comfort, you want to wear thin
socks that are either cotton or wool and are long enough to come up
above the top of your skate boot. This will limit any unwanted
friction and leave plenty of room for flair.
[00:01:45.73] One handy tip is to wear gloves.
(DESCRIPTION)
[00:01:47.50] She holds up a heavy pair of black gloves.
(SPEECH)
[00:01:50.26] Most gloves or mittens will work. But ideally,
you want them to be warm, not too bulky, and water resistant if
possible. Not only will gloves keep your hands toasty, they'll also
help protect them if you fall. And chances are, when you're first
learning, you're going to fall. And it's OK.
(DESCRIPTION)
[00:02:05.09] Small type: We recommend helmets and other
appropriate safety gear for younger skaters.
(SPEECH)
[00:02:09.87] It's part of the process. In fact, later, I'm
going to show you how to fall properly.
(DESCRIPTION)
[00:02:15.07] Wyoma slides across the ice, leans sideways,
and puts one hand down while keeping both feet on the ice. Text, To
be continued. Choose the right skates.
(SPEECH)
[00:02:20.64] [RECORD SCRATCHING]
[00:02:23.33] Today, we're going to talk about two of the
more common kinds of ice skates-- figure skates and hockey skates.
(DESCRIPTION)
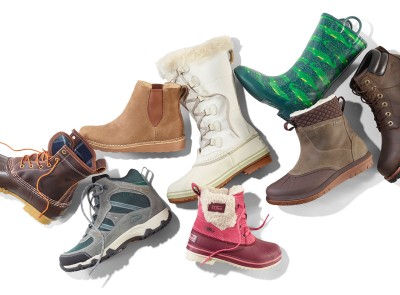
[00:02:28.99] She holds up the black bulkier hockey skate in
her right hand and the white figure skate in her left hand.
(SPEECH)
[00:02:34.44] Both will do the job when you're starting your
skating journey, but you may find that one is better suited to your
needs. We're going to talk about some of the differences between
these two types of skates.
[00:02:43.65] Now most rinks offer rental skates. But if
you're planning on doing a lot of skating, you might want to invest
in a pair of your own.
(DESCRIPTION)
[00:02:50.13] She holds the hockey skate and shows the
blade.
(SPEECH)
[00:02:52.77] Hockey skate blades are generally a little
shorter and attach directly to the boot. These skates are tailored
to quick turns and acceleration. They're even strong enough to
protect against flying hockey pucks.
(DESCRIPTION)
[00:03:03.28] A hockey puck hits the skate while she is
holding it.
(SPEECH)
[00:03:05.52] Hey, the nets over there!
(DESCRIPTION)
[00:03:07.21] Wyoma holds a figure skate.
(SPEECH)
[00:03:08.84] Figure skate blades are generally a little
longer, which means more contact with the ice. This can mean better
balance for the beginning skater.
(DESCRIPTION)
[00:03:15.47] She points to the front end of the blade with
notches.
(SPEECH)
[00:03:18.15] This nifty thing here is called the toe pick.
It's used for jumping and pivoting. You won't use it much as a
beginner. When choosing your skates, I always tell people to pick
what feels right and what aligns with your goals and dreams for
skating.
[00:03:30.87] Now that we've picked the right skates, let's
talk about how to put them on properly.
(DESCRIPTION)
[00:03:34.56] Wyoma laces up her figure skate.
(SPEECH)
[00:03:36.94] You're going to have a hard time on the ice if
your skates don't fit correctly, so make sure to pick the right
size. You can always use a sizing chart to help measure your feet.
(DESCRIPTION)
[00:03:44.90] Chart, column 1, skate size 6 through 10.5.
Column 2, US Size 7.5 to 12.
(SPEECH)
[00:03:52.53] But a general rule of thumb is you may need to
try on one to one and a half sizes down from your shoe size to find
the right fit for you. This can vary from skate to skate depending
on who makes it. It's always a good idea to try them on to make sure
you have the right fit.
[00:04:07.68] Now that we're ready to go, let's lace them
up.
(DESCRIPTION)
[00:04:09.82] Text, How to lace them up.
(SPEECH)
[00:04:11.36] Before sliding your foot in, pull up your
pants hem so no fabric is caught between when you lace up. This can
cause chafing and discomfort.
(DESCRIPTION)
[00:04:19.24] Step 1.
(SPEECH)
[00:04:20.41] First, you want to make sure you loosen your
laces all the way down to the bottom-- enough so that your foot
slides in very comfortably. If you've chosen the right size, your
foot should go in the boot easily.
(DESCRIPTION)
[00:04:31.53] Step 2.
(SPEECH)
[00:04:32.64] Now pull the tongue up and make sure it's
fully extended.
(DESCRIPTION)
[00:04:35.60] Wyoma starts tightening up the laces, starting
at the bottom.
(SPEECH)
[00:04:39.30] Time to start lacing.
(DESCRIPTION)
[00:04:40.30] Text, Step 3.
(SPEECH)
[00:04:42.04] For the lower laces by the toe, pull them
tight enough to make sure they are snug. As you work up the middle
of your skates, pull the laces tighter.
(DESCRIPTION)
[00:04:50.15] Step 4.
(SPEECH)
[00:04:51.22] This is where we want our laces to be the
tightest. Just be mindful of your comfort as too tight can cause
discomfort at the top of your foot.
(DESCRIPTION)
[00:04:59.10] Step 5, put a bow on it.
(SPEECH)
[00:05:00.89] When you're done and they feel snug, put a bow
on it. If your laces are too long on the ends, don't wrap them
around the top. Simply tuck the remains into the tops of your
skates.
[00:05:10.37] All right, now that we've got our skates on,
it's time to hit the ice and learn some skating techniques right
after I have my hot cocoa.
(DESCRIPTION)
[00:05:16.95] A hand pops up and hands Wyoma a mug of cocoa.
(SPEECH)
[00:05:19.75] Thanks.
[00:05:20.44] [MUSIC PLAYING]
(DESCRIPTION)
[00:05:20.47] She gives the hand a high-five, takes a long
drink, smiles, and shrugs her shoulders. Text, How to skate. Wyoma
glides across the ice with her arms straight out to the sides.
(SPEECH)
[00:05:31.15] Let's learn how to skate. Today, we're
practicing in a rink. But these tips would be the same if you were
skating outdoors on a lake or on a pond. The only major difference
is here we have some boards to provide a little extra support.
(DESCRIPTION)
[00:05:42.60] She places one foot at a time on the ice while
holding onto the entrance side panels.
(SPEECH)
[00:05:47.08] Once you first get out on the ice, you want to
find a balanced position.
(DESCRIPTION)
[00:05:50.14] She stands with both feet on the ice next to
the sideboards.
(SPEECH)
[00:05:53.41] Place your hands out in front of you like
they're flat on a table around the middle of your body and bend your
knees. You can use the boards to help support you while you're
finding your balance.
(DESCRIPTION)
[00:06:01.93] She places a hand lightly on top of the board.
(SPEECH)
[00:06:04.81] The next step is to start taking little
marches, barely picking your feet up off the ice. Don't forget to
keep those knees bent. This is going to help you get comfortable
moving on the ice.
(DESCRIPTION)
[00:06:14.50] Wyoma takes tiny steps across the ice and
stays balanced above her skates.
(SPEECH)
[00:06:18.56] Remember this from earlier?
(DESCRIPTION)
[00:06:19.67] Text, How to fall.
(SPEECH)
[00:06:21.36] That's right. It's time to talk about falling.
(DESCRIPTION)
[00:06:23.24] She leans sideways and lands on her bum.
(SPEECH)
[00:06:25.72] Everybody falls when they first learn how to
skate. I even fell. What's important is that we know how to fall
properly and safely. If you feel like you're losing your balance,
bring your arms out in front of you and bend your knees as much as
you can so you can get closer to the ice. If this doesn't stop you
from toppling over, try to relax and fall over to one side.
(DESCRIPTION)
[00:06:44.11] She slowly leans to the side and sits on her
right hip with her hands in front of her.
(SPEECH)
[00:06:48.26] In order to get back up, we're going to roll
over to our knees and bring one leg out in front of us, place one of
your hands on your knee and the other one down on the ice,
preferably gloved, and go ahead and press up to standing.
(DESCRIPTION)
[00:07:00.65] She puts her right leg out in front and pushes
down on it with her hand to stand upright.
(SPEECH)
[00:07:04.66] Now that we've got the hang of marching, let's
try a glide.
(DESCRIPTION)
[00:07:07.12] She stands with her knees bent and her hands
up in front of her.
(SPEECH)
[00:07:10.14] Take a couple of steps to get some speed and
then let your feet come together and slide across the ice. It should
look something like this-- march, march, march, glide, march, march,
march, glide.
(DESCRIPTION)
[00:07:20.49] She takes three steps and puts her feet
together with her knees bent to glide.
(SPEECH)
[00:07:24.00] Now that we've got the hang of gliding on two
feet, if you want to try getting your balance on one foot, you can
try a one-foot glide. Start with a couple marches, do a two-foot
glide, and then lift the toe up to the heel of your skating foot and
balance for as long as you can.
(DESCRIPTION)
[00:07:38.09] She takes a few steps, lifts her left foot up
slightly, takes a few steps, and lifts her right foot up slightly,
toe facing down.
(SPEECH)
[00:07:45.50] Now that you've got the hang of gliding, it's
time to try a couple other learning techniques. Something I really
like to teach all my students is called the rocking horse. You're
going to start with your heels together and your arms out.
(DESCRIPTION)
[00:07:55.46] Her toes face outward.
(SPEECH)
[00:07:56.99] Go ahead and bend your knees and try to make a
small circle with the inside of your skates to bring your toes
together.
(DESCRIPTION)
[00:08:02.22] She pushes her feet wide and then brings them
back together.
(SPEECH)
[00:08:05.37] Keep those knees bent and bring your heels
together so you can go back. So we go toes together, heels together.
(DESCRIPTION)
[00:08:12.67] Toes together move forward. Heels together
move backward.
(SPEECH)
[00:08:16.88] Once you've got the hang of that, we can try
something called swizzles, which is a really fun way to move across
the ice. We're going to start with our heels together the same way,
bend your knees, and bring your toes together. Instead of going
back, keep going forward on this one-- so toes together, heels
together.
(DESCRIPTION)
[00:08:32.77] The skates move in and out to move forward.
(SPEECH)
[00:08:35.55] It's time to try pushing off of the inside
part of our skate. This is called stroking, and it's a great way to
move across the ice.
(DESCRIPTION)
[00:08:41.53] She glides on her left foot and pushes off
with her right toe. Then glides on her right foot and pushes off
with her left toe.
(SPEECH)
[00:08:48.01] Start by bringing your feet together and
bending your knees and pushing off the inside part of your blade.
You want to bring your feet back together after each stroke. So it
goes push, feet together, push, feet together.
(DESCRIPTION)
[00:09:00.01] She alternates left and right.
(SPEECH)
[00:09:02.37] If you're wearing figure skates, try not to
push off of your toe pick. The more you do this, the easier it's
going to get, and you'll find your natural rhythm.
(DESCRIPTION)
[00:09:10.52] She glides forward smoothly.
(SPEECH)
[00:09:12.34] And look at that, we're skating.
(DESCRIPTION)
[00:09:13.99] Wyoma approaches the boards quickly and slams
into them.
(SPEECH)
[00:09:16.82] Now that is how we don't want to stop on the
ice. Sometimes we get so excited about learning how to go forward
that we forget to take the time to develop proper stopping
technique. One of the most basic techniques for stopping on the ice
is called a snowplow stop. We're going to learn how to do that while
holding onto the boards.
(DESCRIPTION)
[00:09:32.11] She rests both hands on top of the board.
(SPEECH)
[00:09:34.22] You're going to start with your feet together
and bend your knees. You want your toes to point slightly in while
you press out and scrape the top layer off the ice-- so bend your
knees, toes turn in, and push out.
(DESCRIPTION)
[00:09:46.85] Her left foot slides to the left while her
right foot slides to the right, she scrapes ice both ways.
(SPEECH)
[00:09:52.11] Once you feel comfortable doing that at the
wall, we can take it away and add a little bit of speed.
(DESCRIPTION)
[00:09:56.22] She backs up onto the open ice.
(SPEECH)
[00:09:57.91] You can do a snowplow stop on either two or
one foot. So starting here, get a little speed, bend the knees, and
stop.
(DESCRIPTION)
[00:10:06.43] She turns both toes facing in, heels out to
stop.
(SPEECH)
[00:10:09.50] And one more time with one foot. Get a little
speed, bend the knees, and stop.
(DESCRIPTION)
[00:10:14.50] She turns her right toe in, heel pointed to
the right to stop.
(SPEECH)
[00:10:17.91] We did it. If you keep practicing, you'll be
skating like a star in no time.
(DESCRIPTION)
[00:10:21.92] Wyoma speeds around the ice backward and does
some spins.
(SPEECH)
[00:10:25.13] Hey, I want to congratulate you. A lot of
people want to learn how to ice skate and they never do. I guess
they just get cold feet. Oh, I bet it's time for me to get off the
ice.
(DESCRIPTION)
[00:10:33.78] The Zamboni ice resurfacer drives onto the
rink.
(SPEECH)
[00:10:36.42] That's it for me today. For more how to videos
like this one, go to the Get Outside Guide at llbean.com.
[00:10:42.63] [MUSIC PLAYING]
(DESCRIPTION)
[00:10:42.67] Wyoma smiles and leaves the ice rink.
[00:10:46.87] Text, For more ways to make getting outside
easy, visit LL Bean dot com slash outside.
[00:10:54.97] Wyoma glides by, skating backward.