How to Put On Snowshoes

Mackenzie walks you through how to put on a snowshoe in five simple steps so you can be ready for your next snowshoe adventure.

4 Min. Watch | Winter

Learning how to put on a snowshoe doesn’t have to be complicated. We’ve broken down the process to these five easy steps that’ll have you ready to head out there in no time.

Step 1: Left or Right?

Start by figuring out which snowshoe goes on which foot. Usually, they say “left” or “right” on the binding or have and “L” and “R”. Universal snowshoes can go on either foot, though it’s best practice to have the buckles face out so they don’t rub.

SHOP SNOWSHOES

Step 2: Place Foot on the Binding

Make sure the straps are open and position the ball of your foot over the pivot point in the center of the snowshoe. Be careful to make sure the front of your boot doesn’t overlap the front of the snowshoe. Otherwise, your foot won’t be able to pass through the hole.

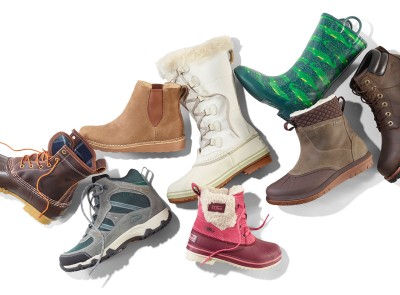
SHOP WINTER BOOTS

Step 3: Secure/Tighten the Straps

There are quite a few different strapping systems out there, but the principle behind them all is fairly similar. There’s usually a piece that secures the front of your foot and one that wraps around your heel. Start by securing the front straps, usually the one closest to your ankle, before securing the heel. Make sure the straps are tight, but not so tight they cut off circulation.

Step 4: Give it a Little Shake

Once the straps are secured, stand up and give the snowshoe a little shake. It should feel secure but not uncomfortably tight. If you feel it moving around a lot, you may need to cinch down the straps a tiny bit more.

Step 5: Repeat on the Other Foot

Follow these steps for your other foot, and you’ll be ready to hit the trails in no time!

Get ready for your next snowshoeing trip with snowshoes, insulated boots and outerwear designed to make it even easier for you to get outside.

Need some inspiration or advice? Explore our Get Outside Guide to learn how to size a snowshoe or find the perfect base layer, outerwear or winter boots and so much more.

(SPEECH)

[00:00:00.00] [MUSIC PLAYING]

(DESCRIPTION)

[00:00:00.03] Text, L.L. Bean, How to put on snowshoes. Mackenzie, Winter Walker. A woman sits next to a fireplace with a mug and a pair of snowshoes.

(SPEECH)

[00:00:07.56] Hey, there. My name is Mackenzie. And today, I'm going to walk you through how to put on a pair of snow shoes. Now, I'm going to be using a pair of LL Bean's Winter Walker Snowshoes to demonstrate, but you should be able to use just about any pair. Let's get to it.

(DESCRIPTION)

[00:00:21.51] Text, Step 1, Left or right.

(SPEECH)

[00:00:22.15] The first thing you're going to want to do is figure out if your snowshoes have a specific left or right or if they're universal and can work on either foot. Usually, there's a little L or R on the binding, or it will actually say left or right.

[00:00:35.46] If you do have a universal pair, good practice is to have the buckles and straps facing the outside of the foot. That way, the buckles aren't rubbing up against each other.

(DESCRIPTION)

[00:00:44.41] Text, Step 2, Place foot on the binding.

(SPEECH)

[00:00:45.33] Now that you've figured that out, you want to find a nice flat spot to put on your snowshoes. If you want to do a test run indoors before you head out into the cold, you'll want to put something down on your floors to protect them from the crampons. Those are the pointy bits down here. I'm using a super tough Waterhog mat to protect my floors while I try these on.

[00:01:04.23] With that taken care of, make sure the straps are open, and position the ball of your foot over the pivot point in the center of the snowshoe, usually right over the crampon. Be careful to make sure the front of your boot doesn't overlap the front of the snowshoe. Otherwise, your foot won't be able to pass through the hole.

(DESCRIPTION)

[00:01:22.75] Text, Step 3, Secure slash tighten the straps.

(SPEECH)

[00:01:24.15] Here's where things can get a little tricky. There are quite a few different strapping systems out there. However, the principles behind them all are fairly similar.

[00:01:32.46] Usually, there's a piece that secures the front and one that wraps around the heel. For our Winter Walker Snowshoes, we have two straps up front with an innovative ratcheting system to help secure them easily, even if you have gloves on. And then there's a strap along the heel. I like to start with the front straps, usually the ones closest to my ankle, before securing the heel. Make sure the straps are tight but not so tight they cut off circulation.

(DESCRIPTION)

[00:02:00.45] She ratchets the straps to tighten the boot. Text, Step 4, Give it a little shake.

(SPEECH)

[00:02:04.39] Now that the straps are secure, stand up and give your snowshoe a little shake. It should feel secure but not too tight. If it's moving around a lot, you may need to cinch the straps down just a little bit more.

(DESCRIPTION)

[00:02:15.36] Text, Step 5, Repeat on the other foot.

(SPEECH)

[00:02:15.79] Now that you've put on one snowshoe, repeat these steps to put on the next snowshoe, and you'll be ready to head outside in no time. I'll see you out there.

(DESCRIPTION)

[00:02:24.58] Text, Get more tips at LL bean.com/outside.